
Bridal makeup is one of those areas almost every makeup artist works in at some point. I've just come back from a four-day wedding in the South of France, and although I only do two or three weddings a year now, bridal has always been part of my work. There are plenty of crossovers with how I approach red carpet makeup, but wedding makeup still has its own rules.
For me, the key to beautiful bridal makeup is balancing longevity and lightness. I want the makeup to last, photograph beautifully and feel comfortable, but I never want a bride to feel like she's wearing a mask. My bride in France was getting married at around 6pm, but it was still bright, warm and in the mid-to-late twenties, so everything from my skincare choices to how I set the complexion had to take that into account.
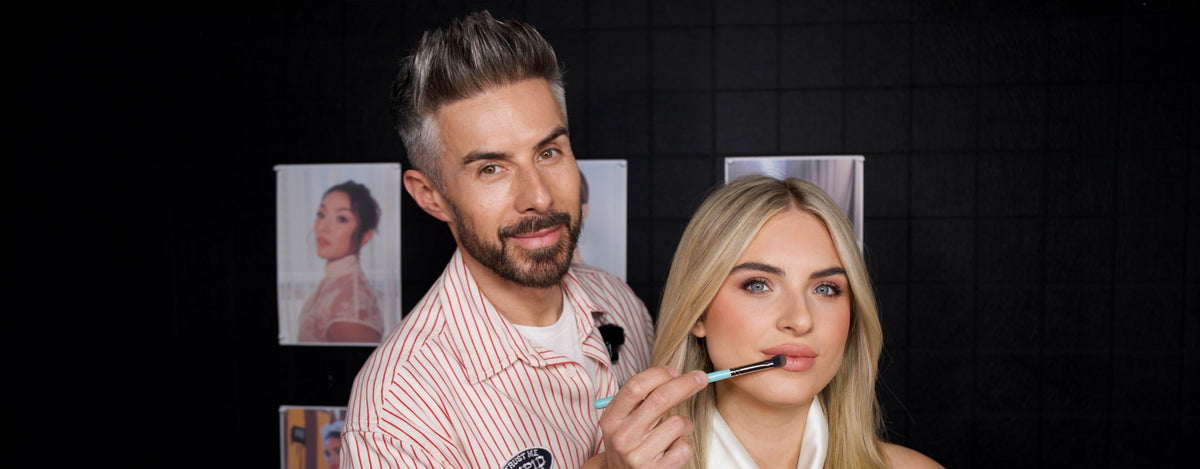
For Episode 34 of Makeup Live, I wanted to recreate that approach and share the products, tools and techniques I use for a long-lasting bridal look that still feels soft, polished and recognisable. And because it was Liv's birthday, she became my bride for the day.
BRIDAL SKIN PREP: KEEP IT SIMPLE
I keep bridal skin prep relatively simple. I don't like doing anything too active on the wedding morning because you never know how the skin might react. Even if somebody normally gets on well with a product, I wouldn't introduce a strong face mask or exfoliating treatment on one of the biggest days of their life. I'm generally comfortable using under-eye patches, but anything more active I'd want to have tested during the bridal trial.
I started by going over Liv's skin with micellar water before applying Tatcha The Dewy Skin Cream. I wanted the skin hydrated and comfortable without overloading it, particularly as I was recreating a look from a warmer climate. Too much rich skincare under foundation can leave you fighting shine with powder later, and that's when a lightweight complexion starts getting heavier.
I also tell my brides to keep their skincare familiar in the days before the wedding. Don't throw everything at your skin the night before. Stay hydrated, use products you know work for you and drink plenty of water. Wedding mornings often involve champagne, late nights and nerves, and dehydration shows in the skin.
WHY I USE PRIMER FOR BRIDAL MAKEUP
I don't automatically use primer. Editorially, it can sometimes be one layer too many, but for bridal and red carpet makeup, longevity matters much more. For Liv, I used the Clé de Peau mattifying primer with SPF 25. Laura Mercier also makes beautiful primers, whether I need something radiant, blurring or universal.
The environment always dictates what I reach for. Is the bride outside? Is it hot and humid? Is it a winter wedding? Will she be in direct sunlight for hours? For this look, I wanted Liv's skin hydrated but controlled: not overly dewy and definitely not flat or matte.
WHY I START BRIDAL MAKEUP WITH COMPLEXION
For bridal or red carpet makeup, I generally start with the complexion. The exception is when I'm creating an eye with lots of powder and fallout, but most of the time I want my client to see their skin coming together first. It's reassuring to look in the mirror and still recognise yourself before we build the rest of the makeup.
It's also practical. You're often working alongside a hairstylist while somebody is blow-drying or moving the head, and I'd much rather be bouncing foundation onto the skin than creating a delicate eye while the bride is moving. Wedding mornings rarely involve two uninterrupted hours of sitting still, so you have to work with the environment rather than against it.
LONG-LASTING BRIDAL FOUNDATION IS ALL ABOUT LAYERS
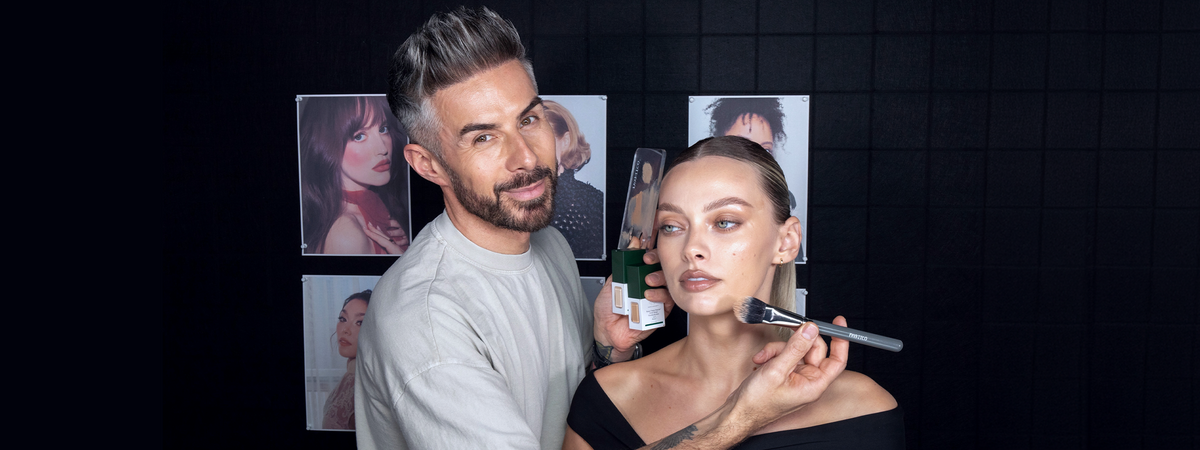
For Liv's foundation, I used Armani Luminous Silk. It works beautifully for wedding makeup because it gives coverage without looking heavy. The finish sits somewhere between matte and dewy, almost like cashmere, which is exactly where I wanted this complexion.
I mixed two shades for the right match and applied it with the MYKITCO MY ON POINT BLENDER. The flatter sides are brilliant for laying down that first layer, while the pointed end lets me work precisely around the eyes, nose and smaller areas. I used this sponge constantly in France because it gave me the soft, melted finish I wanted.

The biggest thing with long-lasting foundation is to build in light layers. I'd always rather start sheer and add coverage where needed than apply a heavy layer from the beginning. More product doesn't mean more longevity. Building strategically gives you more control and keeps the complexion looking like real skin.
MY BRIDAL COMPLEXION DUO
Once the first layer was on, I went in with the 703 – MY SMOOTH & PERFECT BRUSH. The MY ON POINT BLENDER and the 703 became my complexion duo in France: the sponge gives me the seamless base, and the 703 lets me go back in and perfect the details.
The smaller end of the 703 is brilliant around the nostrils, under the eyes and anywhere I need more control. It's rounded almost like a fingertip, so I can press, swirl and perfect without creating a hard edge. For concealer, I used VIEVE Skin Nova Concealer, which gives coverage while keeping a luminous, hydrated finish under the eye.

I pressed the concealer in with the smaller end of the 703, using little bouncing motions rather than dragging. That movement is a huge part of my approach. I want foundation and concealer melted together so you can't see where one product ends and the next begins.
CORRECT ONLY WHERE YOU NEED IT
If I'm dealing with pigmentation, dark circles or blemishes, I'd rather target those areas individually than increase coverage across the whole face. For colour correction, I still come back to the MAC Pro palettes. I've used them for years, I know exactly how they behave, and the deeper orange tones are particularly useful across Indian and deeper skin tones.
For fuller coverage, Hourglass Vanish Concealer is a favourite, and Huda Beauty has brilliant complexion options with a strong range of undertones. The key with colour correction is knowing when to stop. It's easy to overcorrect, so correct what needs correcting and let the rest remain skin.
CREAM CONTOUR AND BLUSH FOR BRIDAL SKIN
I don't tend to underpaint. Lots of artists get beautiful results with it, but I prefer to create my foundation first and sculpt over the top. For Liv, I used Rare Beauty liquid contour in Mellow, blending it with the MY ON POINT BLENDER and taking the sculpt slightly higher through the cheekbones. Because the complexion was still unset, everything melted together naturally.
For blush, I used Rare Beauty Soft Pinch Liquid Blush in Bliss. That ballet-slipper baby pink always works beautifully for bridal. I pressed it in with the same damp sponge, which already had a little foundation and contour in it, so everything blended almost instantly. I then added a touch of NARS Orgasm on top.
This is where the light layers start working together: foundation, concealer, cream contour, cream blush and a little powder blush. Individually, nothing feels heavy, but together they give me the finish and longevity I need.
WHY I DON'T SET THE SKIN STRAIGHT AWAY
Once I've built the complexion, I leave it alone for a while. I don't powder straight away because I want the foundation, concealer and creams to settle while I work on the eyes, brows and lashes. Keeping everything moveable also means I can easily correct anything that gets disturbed.
It lets me see how the makeup reacts too. Has the blush softened? Do I want more bronzer? Does an area need more concealer? I'd rather reassess towards the end, based on what the skin actually needs, than powder too early and lock myself in.
Once Liv's base had settled, I wanted a little extra brightness through the inner under-eye. I added a small amount of Huda Beauty concealer in Cherry Blossom through the inner corner, between the brows and lightly down the nose. A tiny adjustment, but it immediately gave that extra pop.
SOFT, POLISHED BRIDAL EYE MAKEUP
For bridal eyes, I want definition without everything feeling overly structured. The eyes should mirror the complexion: soft, seamless and polished. I started with ILIA Liquid Powder Chromatic Eye Tint in Dim, a beautiful heathery shade with subtle shimmer, blended across Liv's lid with the 223 – MY FLUFFY BLENDER.
For a completely matte eye, I may use concealer on the lid first as a neutral canvas. With a liquid or cream formula like this, I'm happy to let the product work directly on the eye. I'm always careful not to build too many layers around the eye, as I want bridal makeup to stay fresh for hours.
THE BEST BRUSHES FOR SMALLER AND HOODED EYES
Something we've been talking about a lot at MYKITCO is brush sizing. Not everybody has a huge eyelid, and on smaller or hooded eyes a big blending brush can take over the space very quickly. Smaller brushes give you more control and let you define the eye without correcting lots of over-blending afterwards.

I started with the 251 – MY SOFT SMUDGE. It's small enough to work close to the lash line but fluffy enough to diffuse colour beautifully. I then moved to the 253 – MY PRECISE SMUDGE, which is even smaller and lets me place shadow exactly where I want it. It's dense enough for good payoff but soft enough to blend.
Using the Makeup by Mario palettes, I built gentle definition around Liv's lash line and outer corner. I wasn't trying to change the shape of her eye, just add softness and definition while keeping the look clean.

HOW I TIGHTLINE FOR SOFTER DEFINITION
For more definition, I reached for the 264 – MY TIGHTLINER. Its tiny rectangular shape lets me stamp shadow directly between the lashes rather than creating a visible line on the lid. A true tightline doesn't sit on the waterline or above the lashes; it lives between them, creating the illusion of a denser lash line without taking up lid space.
For Liv, I gently stamped a deep charcoal brown from Makeup by Mario between the lashes. Keep the process calm and controlled. You're working very close to somebody's eye, and the last thing you want on a wedding morning is streaming eyes before you've finished.

If somebody has particularly watery eyes but really wants product on their waterline, I'm happy to hand them the pencil and let them do it themselves. I'm not precious about applying absolutely everything. Keeping your bride comfortable matters more.
SOFT SHIMMER AND DEFINED LASHES
To finish the eyes, I pressed a cool-toned shimmer from the Makeup by Mario Ethereal Eyes palette through the centre of Liv's lid with my fingertip. I wasn't after obvious sparkle, just enough reflection to brighten the eye. Liv's eyes pull slightly blue-green, and those heathery tones really brought the colour out.
Once mascara was on, I used the 301 – MY DEFINED LASH to separate and position the lashes, pushing them side to side and fanning them out. It's particularly useful for lower lashes, where I work from the side so I can see exactly where each lash grows from and get right into the root.

For false lashes, I used Dark Swan of Denmark Secret Lashes. I love clusters for bridal because they're quick, customisable and natural-looking without the heaviness of a full strip. I only added a couple through Liv's outer corners: enough to lift and define without overpowering.
SETTING BRIDAL MAKEUP WITHOUT LOSING THE GLOW
With the eyes finished, I came back to the complexion. Powder choice really matters here, because you can spend all that time creating lightweight skin and then change the finish completely with something too heavy.
I used Sculpted by Aimee Velvet Veil, a really fine, translucent powder. I've been gravitating towards these textures because they blur and soften without looking powdered. Laura Mercier Secret Brightening Powder is another favourite, while Huda Beauty powders are brilliant when I want more correction or pigment.
I concentrated the powder only where I needed it rather than setting the entire face. I want the makeup to last, but I still want movement and luminosity. Longevity doesn't have to mean taking all the life out of the skin.
THE FINAL BRIDAL COMPLEXION POLISH
Once everything had settled, I went in with Hourglass Ambient Lighting Bronzer and the 162 – MY POLISHED POWDER. I'm not trying to change anything dramatically at this stage, just bring the complexion together with a final soft-focus polish.
The 162 is incredibly soft, so I can use barely any pressure without disturbing the creams underneath. Hourglass powders work beautifully here because they add warmth and dimension without making the complexion look heavily bronzed or matte.
For me, a beautiful bridal complexion comes down to three things working together: the right product, the right tool and the right technique.
THE BRIDAL LIP I USED IN THE SOUTH OF FRANCE
For Liv's lip, I recreated the combination I'd used in France. I started with Morphe Lip Pencil in Backseat Love, shaping the centre of the mouth first. I establish the cupid's bow and height through the centre before joining into the outer corners, because I want the fullness to sit in the middle of the lip.
I then reached for the 504 – MY BLURRED LIP, one of my absolute hero brushes. Unlike a conventional flat lip brush, its fluffy synthetic fibres let me soften the liner, blur the edges and press colour into the lip rather than painting a thick layer on top.
For lipstick, I used Charlotte Tilbury Pillow Talk, pressed in with the 504 so the colour worked into the lip's natural texture. You still get shape, fullness and colour, but the finish feels softer and more effortless, which is exactly how I want a bridal lip to look.
BRIDAL MAKEUP IS ABOUT MORE THAN MAKEUP
One of the biggest things I've learned from weddings has nothing to do with products. A wedding morning can be chaotic. Your bride might be talking to the planner, somebody's asking about seating, the photographer needs her, family are coming in and out and somebody is probably running late.
You have to work with that rather than against it. Even if you think the makeup looks incredible, your bride may get into her own head and want something changed. If she does, change it. Stay calm and remember that whatever emotion is happening in your chair may have nothing to do with the makeup.
You almost become a sounding board for the morning. Be the calm person in the room. Sometimes a bride just needs somebody to look at her and say, "We've got this."
WHY A BRIDAL MAKEUP TRIAL MATTERS
A bridal trial is about much more than choosing a lipstick. It lets you understand the skin, test products, see how the eyes react and learn how much makeup your bride feels comfortable wearing. If you're considering anything active in the prep, it's your chance to test it safely.
Most importantly, the trial builds trust. We all have our own style, but the bride has to feel like herself. I once had a bride who wanted a full black smoky eye, glossy nude lip, big hair and a huge dress. Would that have been my first choice? Probably not. But it was what she wanted, so my job was to give her the chicest version of that look possible.
You guide, advise and bring your experience, but ultimately it's their face and their wedding day.
MY APPROACH TO LONG-LASTING BRIDAL MAKEUP
For me, bridal makeup is all about balance: longevity without heaviness, polish without masking somebody and definition without overstructuring every feature. Build the complexion in light layers, keep creams moveable for as long as possible and use powder deliberately rather than automatically.
Nothing should immediately scream foundation, blush, contour or eyeshadow. The products, textures and tones should work together as one complete look rather than lots of individual steps.
Most importantly, when my bride looks in the mirror, I want her to recognise herself. Just the most polished and confident version.
FROM THE CHAT: YOUR QUESTIONS ANSWERED
Does the order of makeup matter for bridal?
I generally start with complexion so my bride sees herself coming together, and it works well alongside a hairstylist. For an eye with lots of fallout, I may do eyes first.
Should you exfoliate on the wedding morning?
Only if it's gentle and already tested during the trial. Never anything strong or new on the day.
How do you make bridal foundation last?
Lots of light layers, building coverage gradually and setting strategically.
What do you recommend for colour correction?
The MAC Pro palettes. They offer plenty of options across skin tones and I know exactly how they behave.
Do you bake bridal makeup?
Only when and where needed. Climate, skin type and the longevity required should dictate how much powder you use.
What do you recommend for fuller coverage concealer?
Hourglass Vanish Concealer, and Huda Beauty also has brilliant fuller coverage options.
What do you do with very watery eyes?
I do anything that might make them water earlier in the makeup so they can settle. If a sensitive client wants product on the waterline, I'm happy to let them apply it.
Do you prefer powder or pencil for tightlining?
Powder gives softer, more controlled definition; pencil gives more intensity. It depends on the eye and the look.
What lashes do you recommend for bridal?
Clusters. They're quick, customisable and natural without the heaviness of a strip lash.
What powder do you recommend for lightweight bridal skin?
Sculpted by Aimee Velvet Veil for a sheer, translucent finish, and Laura Mercier Secret Brightening Powder.
THE FULL PRODUCT EDIT
Skin prep
Tatcha The Dewy Skin Cream
Clé de Peau Beauté Mattifying Primer SPF 25
Complexion
Armani Luminous Silk Foundation
VIEVE Skin Nova Concealer
Huda Beauty Concealer – Cherry Blossom
Rare Beauty Liquid Contour – Mellow
Rare Beauty Soft Pinch Liquid Blush – Bliss
NARS Blush – Orgasm
Sculpted by Aimee Velvet Veil
Hourglass Ambient Lighting Bronzer
Eyes
ILIA Liquid Powder Chromatic Eye Tint – Dim
Makeup by Mario Master Mattes
Makeup by Mario Ethereal Eyes
Dark Swan of Denmark Secret Lashes
Lip
Morphe Lip Pencil – Backseat Love
Charlotte Tilbury Pillow Talk Lipstick
MYKITCO tools
MY ON POINT BLENDER
703 – MY SMOOTH & PERFECT BRUSH
223 – MY FLUFFY BLENDER
251 – MY SOFT SMUDGE
253 – MY PRECISE SMUDGE
264 – MY TIGHTLINER
301 – MY DEFINED LASH
162 – MY POLISHED POWDER
504 – MY BLURRED LIP
Share:
Episode 33: My favourite glam right now